|
 |  |  | | Maker Faire 2012 was coming up and I wanted a display to show the "anatomy" of the RGB LEDs I use.
I though it would be nice to make a scaled-up model true to the internals of a 5mm one.
I needed a bell jar, for sure so I kept an eye out at thrift stores and eBay.
Many online were relatively small display jars for dolls, but one had a 12x20 acrylic one for $100. Yikes!
Turns out this was actually a good deal and I should have gone for it.
I eventually spied one of those tacky table clocks with the spinning balls in a glass bell jar about 5x12" and snapped it up for $11USD.
So now I had a dimension to base my scale on.
I needed square hollow rods for the LED leads because, well, they are square leads.
First I looked at the rods and poles section of the hardware store and they were suuuuper expensive for what I was looking for, and of cast iron.
Then I remembered the towel racks in my parents' house are shiny, hollow square rods!
I go the the bathroom/fixture area and behold! The exact rods there for a more reasonable price.
I went to TAP plastics to buy some acrylic for the base of the LED and they sell pre-cut discs, about right for my 5"dia. bell jar.
I also picked up some little acrylic cube containers I though would make excellent faux silicon dies if I frosted them and put high-power LEDs inside...
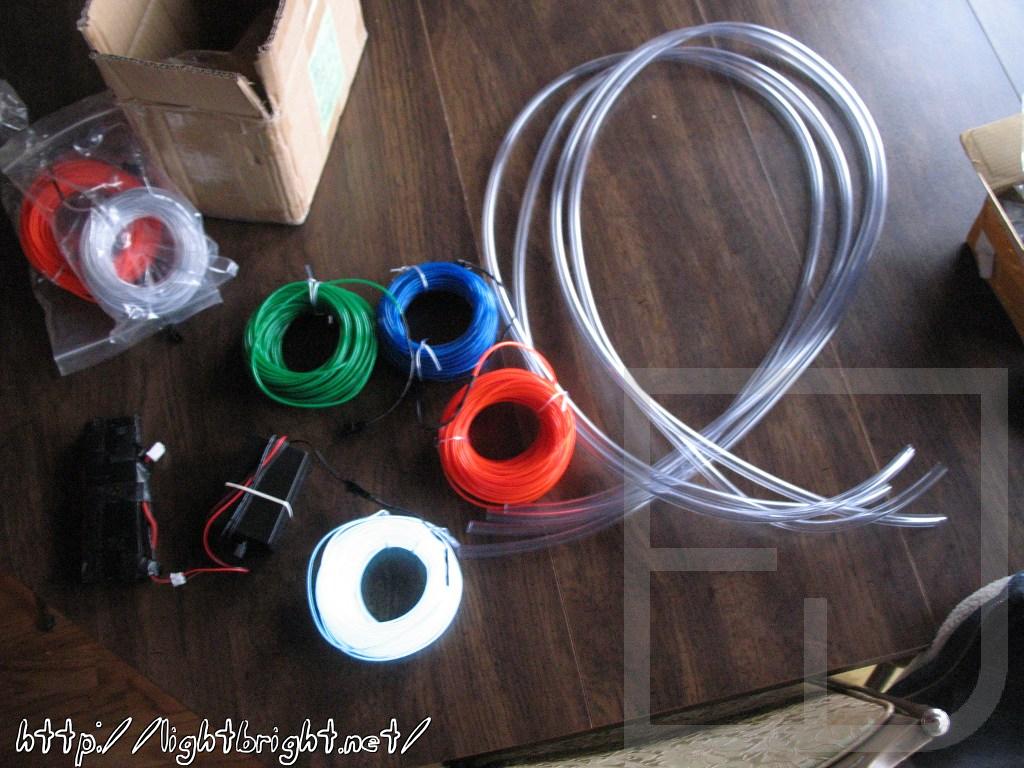
I bought 3x5ft lengths of clear PVC tubing I wanted to fill with EL wire for the protoboard leads and have them actually be the controls to light up the elements inside.
I recently bought ~20m of every colour I could find! And a few triacs and opto-couplers to control them, hopefully via microcontroller.
Next I needed the baseplate that the dies sit on, and also to act as a heat sink for the 3W LEDs I plan to use.
My first thought was maybe an aluminium butter dish but I couldn't find any, but I saw little aluminium oven dishes that I could cut to size.
These were more of a thick foil, but I used them to prototype and shape the look I was after.
After playing with my 3W R, G, B stars I found they produced quite a bit of heat so I needed a thicker plate!
Back to the hardware store I bought a piece of sheet metal and tin snips, planning to hammer it out to shape.
I go home and begin dremeling everything into shape with many-a-to-be-shattered cutoff wheels.
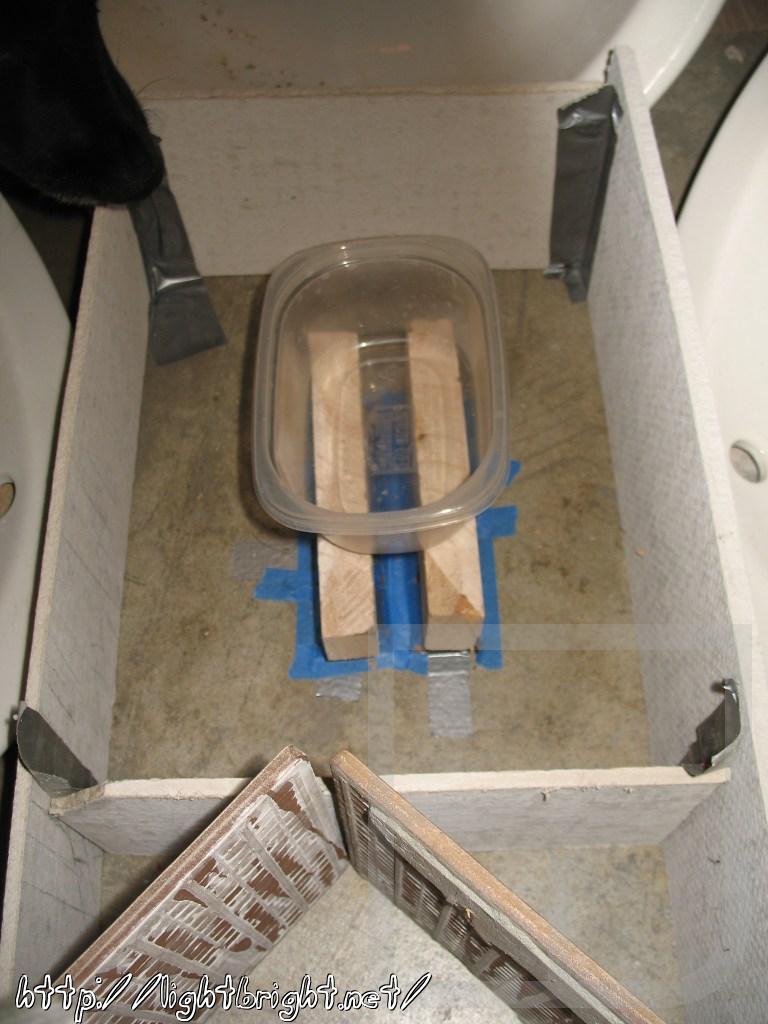
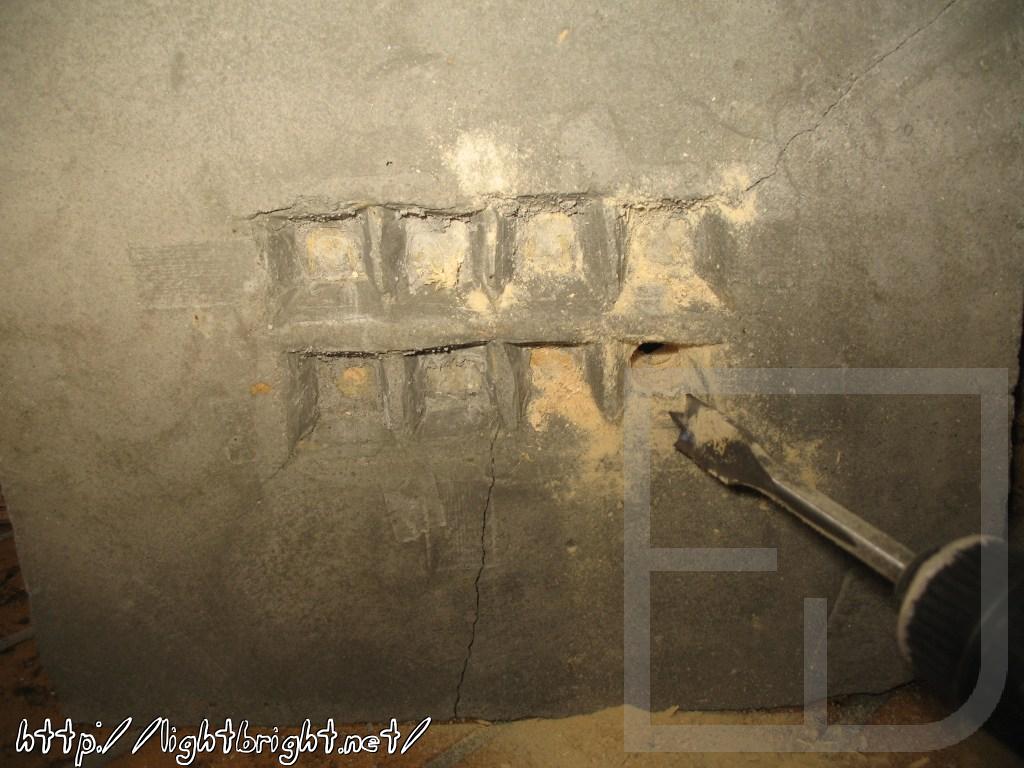
I made a base unit out of concrete of offset the top-heavyness, cut a bunch of trapezoids out to make the dimples a protoboard might have, assembled and taped them to the garage floor with wooden blocks on top to later give a drillable path for holes.
I mixed the concrete by hand (this later revealed to destroy my skin) and poured it into the makeshift mould on the floor.
Using a plastic food container I offset a cavity for the electronics to sit.
Once "cured" it was very crumbly and cracked. Augh! I read that pouring water on it would fix this. It did :)
Though for the crack I'll just have to put a ratcheting tie around it to hold it together for now.
I drilled out holes just-oh-so-right for the square rods to snugly fit into the wood blocks.
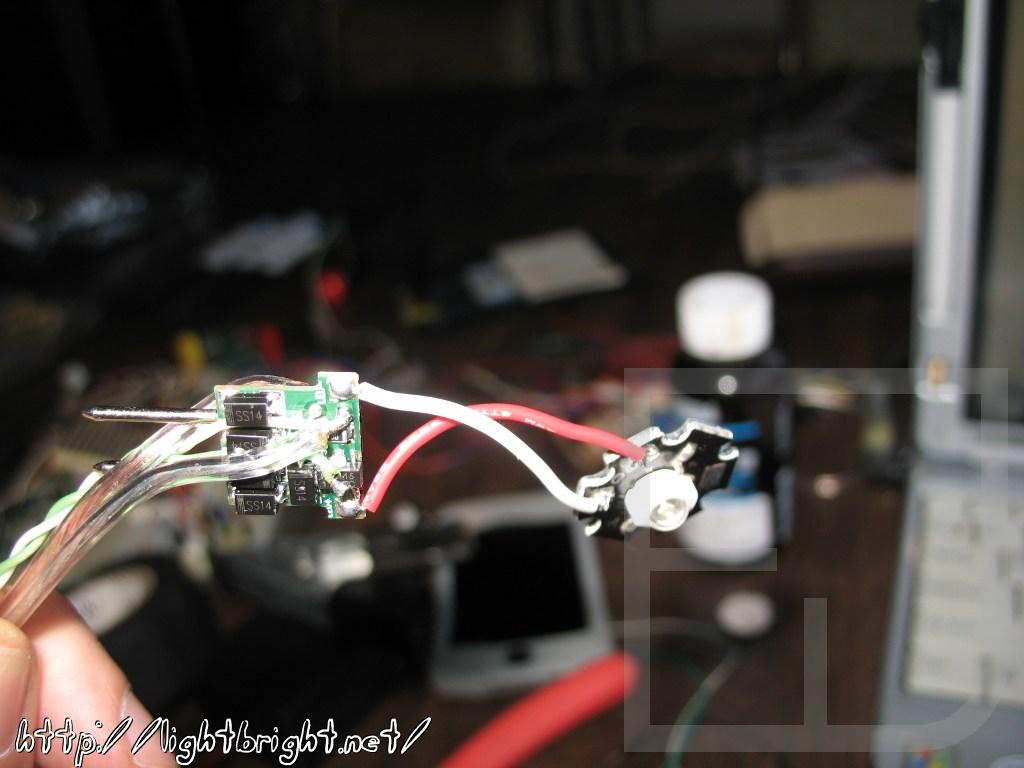
The drivers for the 3W LEDs are meant for ~12VAC track lighting and have bridge rectifiers to make DC.
Now, these will work with DC as-is, but I don't want to create extra heat because of the extra diodes so I will bypass these.
The driver IC has an "enable" pin that is internally tied high, but I want to make the lights light on my own, so I tie them low and wire in my own line to enable on high via optocoupler.
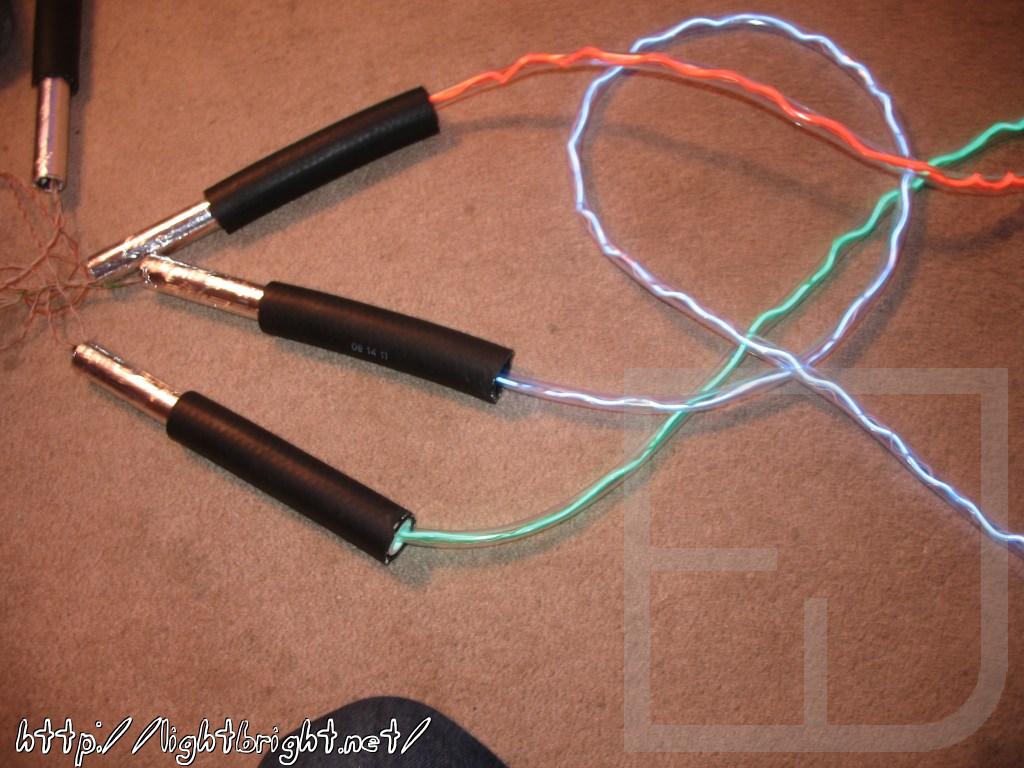
One more trip to the hardware store to get the bits for my protoboard jumper wires.
I picked out some PVC pipe about the same girth as the LED towel rod leads, and found some rubber hosing that fit around the pipe nicely.
The PVC will stiffen the rubber hose, which provides the look and feel of actual jumper wires and wrapping the exposed PVC in aluminium tape to make it look like a lead.
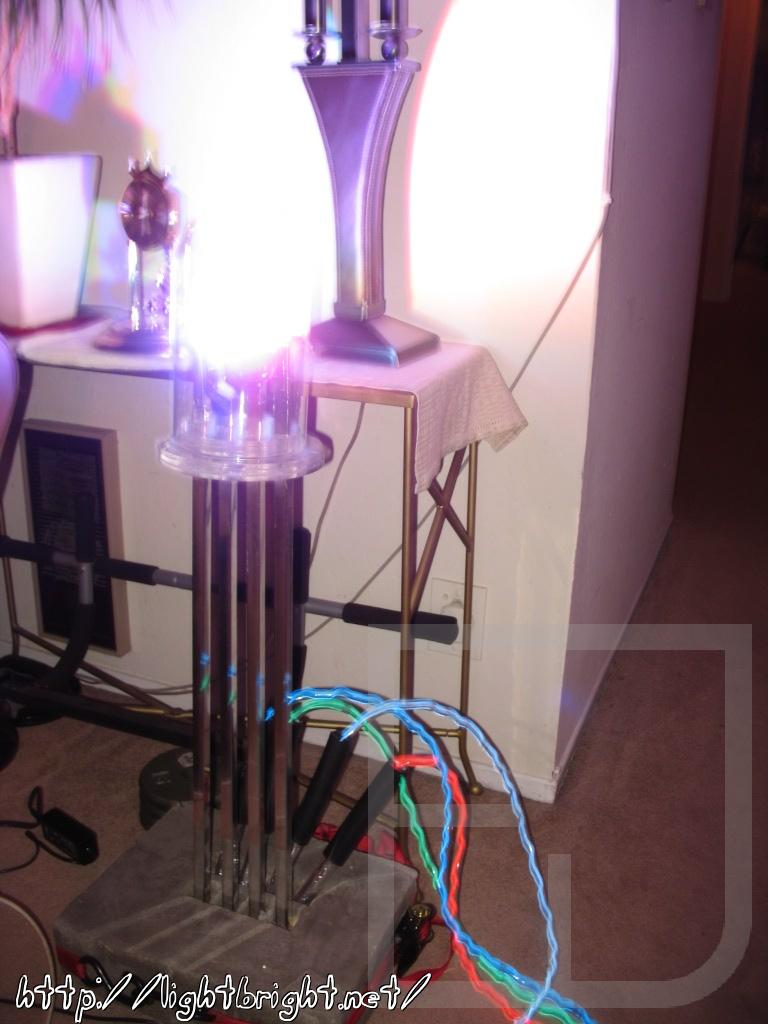
And for finishing touches, I placed cotton balls in the "dies" for diffusion and single strands of 32AWG wire as the gold bonding wires that attach the LED leads to the LED dies.
The final 28x working scale model RGB LED.
|
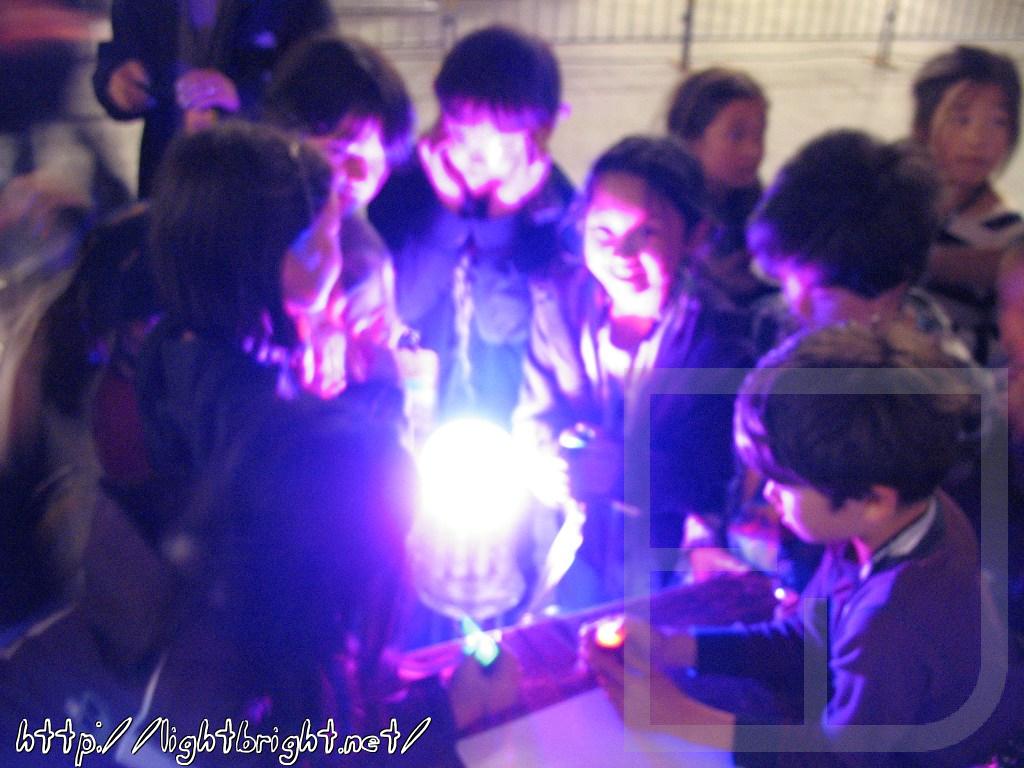
| At the Maker Faire Education Day
|
I bought a bunch of solar garden lights that contain one (1) LED each and replaced the LED with coloured LEDs. The effect is quite cool, and in the dark does give enough light to watch your step. I noticed the Red and Yellow ones die really fast, I'm assuming because I put no extra limiting resistor in series they draw too much power too soon. I did this on-the-fly at and for Lightning in a Bottle 2011!
| |  | |  |
|